A bad selfie is not usually caused by how you look. It is caused by where your camera is, where your light is, and which camera mode you are using. Change those three things and the same face produces a dramatically different result — one that scores significantly higher in BestPick's analysis and performs measurably better on the platforms you care about.
BestPick users who submit selfies as their profile photo candidates frequently have the same feedback pattern: the selfie is their lowest-scoring submission, and the reason is almost always one of the three mistakes covered in this guide. The good news is all three are fixable in under five minutes, with no equipment beyond the phone you already own.
In BestPick's selfie submissions, the single most common reason for a low score is camera held at or below eye level, which creates an unflattering upward angle. Correcting the camera height alone improves the visual impression significantly — before addressing lighting or expression.
Mistake 1: Camera at the Wrong Height
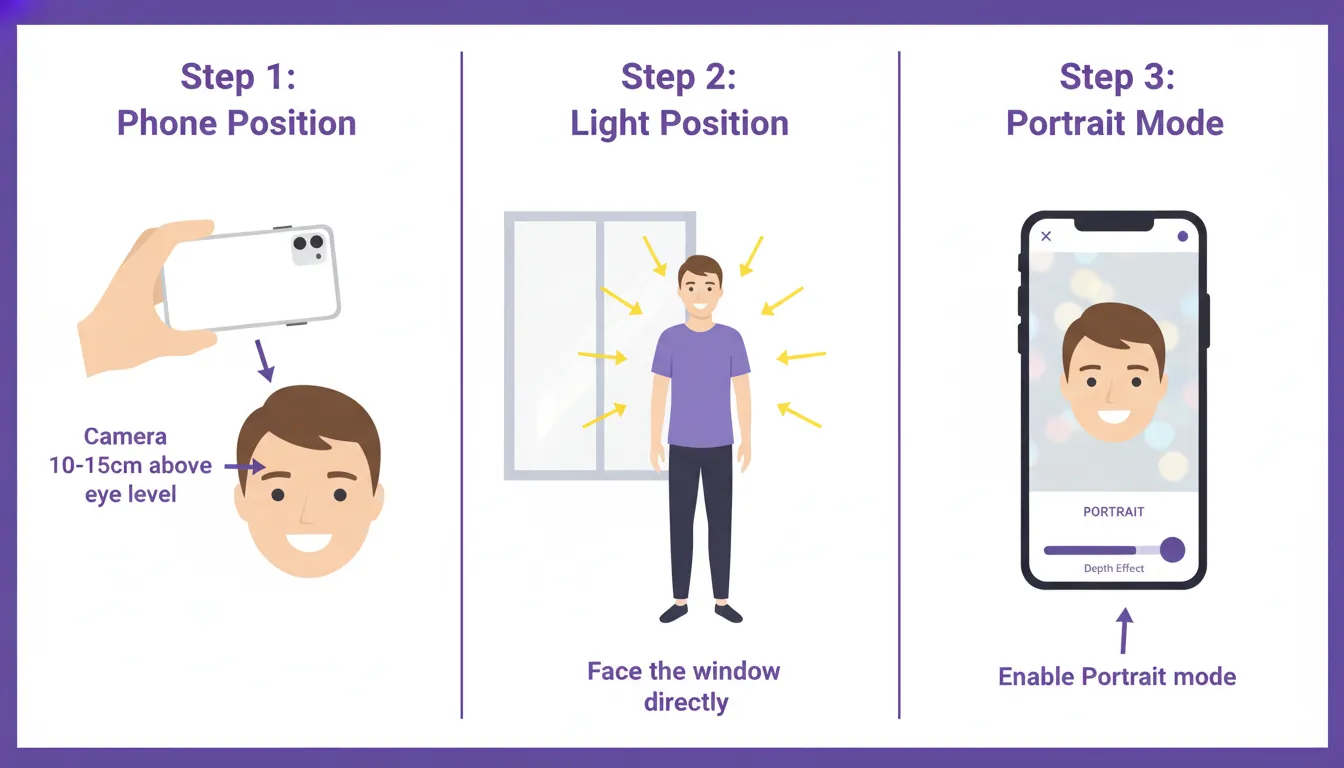
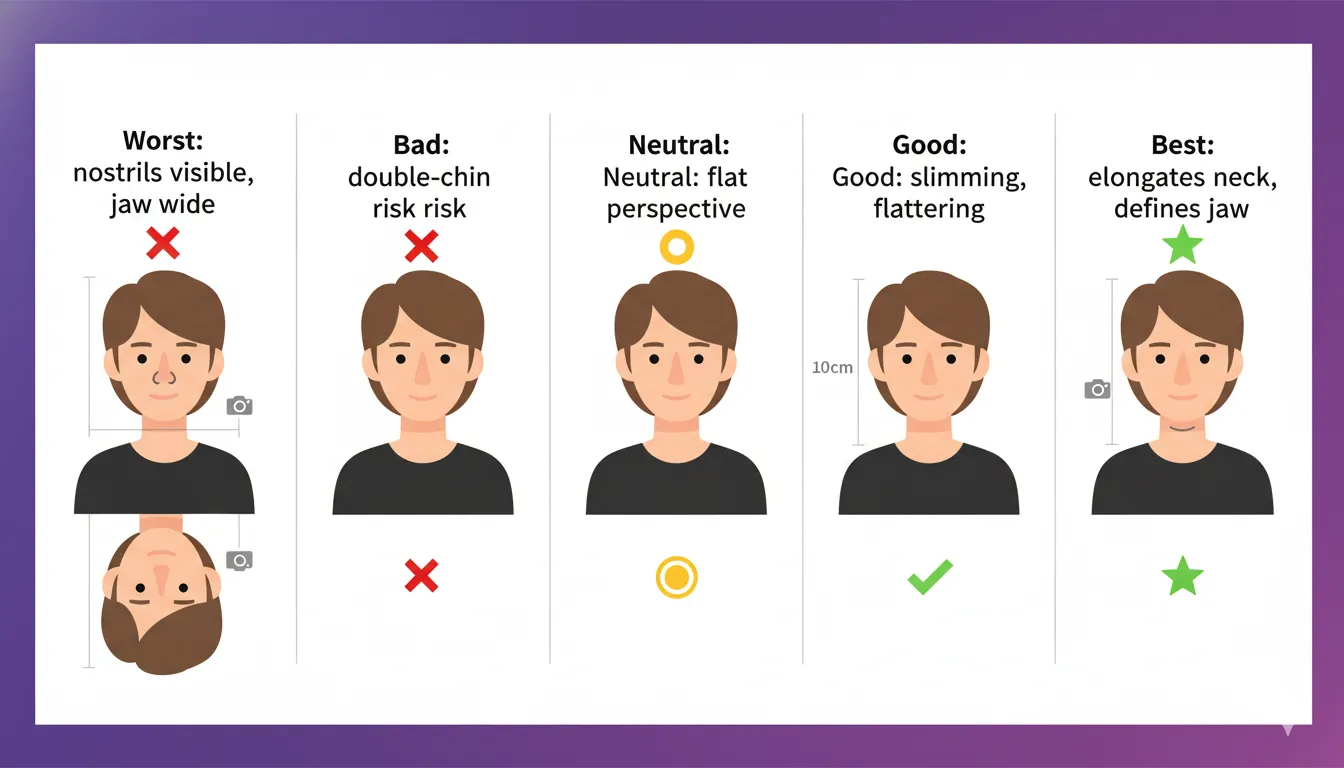
Camera angle is the most impactful variable in selfie quality — and the most commonly wrong. The camera should be positioned 10–15cm above your eye level, angled very slightly down toward your face. This specific angle does three things simultaneously: it creates a slimming effect on the face by reducing the apparent width of the jaw; it elongates the neck by showing more of it; and it eliminates the double-chin effect that low angles produce by changing the perspective from which the chin-to-neck area is viewed.
The opposite — holding the phone at or below eye level — is the most common selfie mistake. It produces an upward-angled shot where the nostrils are visible, the jawline widens, and the forehead is compressed. This is the angle that produces photos where people say "I hate photos of myself" — because most casual self-photos are taken at this angle.
Practical fix: hold your arm fully extended and slightly above shoulder height, tilting the phone face downward toward you. Or use a selfie stick set to the same position. Or, better still, use the back camera (higher quality sensor) with a 3-second or 10-second timer and a phone stand or stack of books at the right height.
Mistake 2: Wrong Light Source
Lighting quality is the variable that most separates a mediocre selfie from a professional-quality one. The rules are simple but consistently ignored:
Face your light source, never have it behind or beside you. A light source directly behind you (a window at your back) creates a silhouette — your face appears dark and underexposed. A light source sharply to one side creates strong directional shadows that are unflattering for most people. Light sources in front of you, at the same level as or slightly above your face, produce even, flattering illumination.
Natural window light is the best free lighting available. Position yourself directly facing a large window that receives indirect daylight — not direct sun, which is too harsh. The size of the window determines the softness of the light: larger windows produce softer, more flattering light. A north-facing window (in the northern hemisphere) or any window on a consistently overcast day produces ideal diffused light.
Avoid overhead ceiling lights and flash. Overhead lighting creates shadow under the eyes, nose, and chin — the "skull lighting" effect that makes people look tired or hollow. Camera flash eliminates shadow entirely, producing a flat, passport-photo look that lacks dimension.
Catchlights are the difference between a flat selfie and a professional one. Catchlights are the small reflections of the light source visible in the irises of the eyes. They are what make eyes look alive and engaged in a photo. They are produced automatically when you face a light source directly. If your selfie eyes look flat and dark, you do not have catchlights — move to face the window directly.
Mistake 3: Looking at Your Face Instead of the Lens
This is the most subtle mistake and one of the most impactful. When taking a selfie, the instinct is to look at your own face on the screen — to check your expression, your hair, your framing. But looking at your face on screen means your gaze is directed slightly to the side of and below the camera lens. In the resulting photo, your eyes are not looking at the viewer — they are looking at something off to the side, producing an indirect gaze that scores significantly lower on engagement metrics.
The fix is simple: look directly at the camera lens itself — the small circle at the top of your phone's front camera module. Not the screen. The lens. When you do this, the resulting photo shows you making direct eye contact with whoever views the image, which creates the psychological connection effect that drives higher engagement.
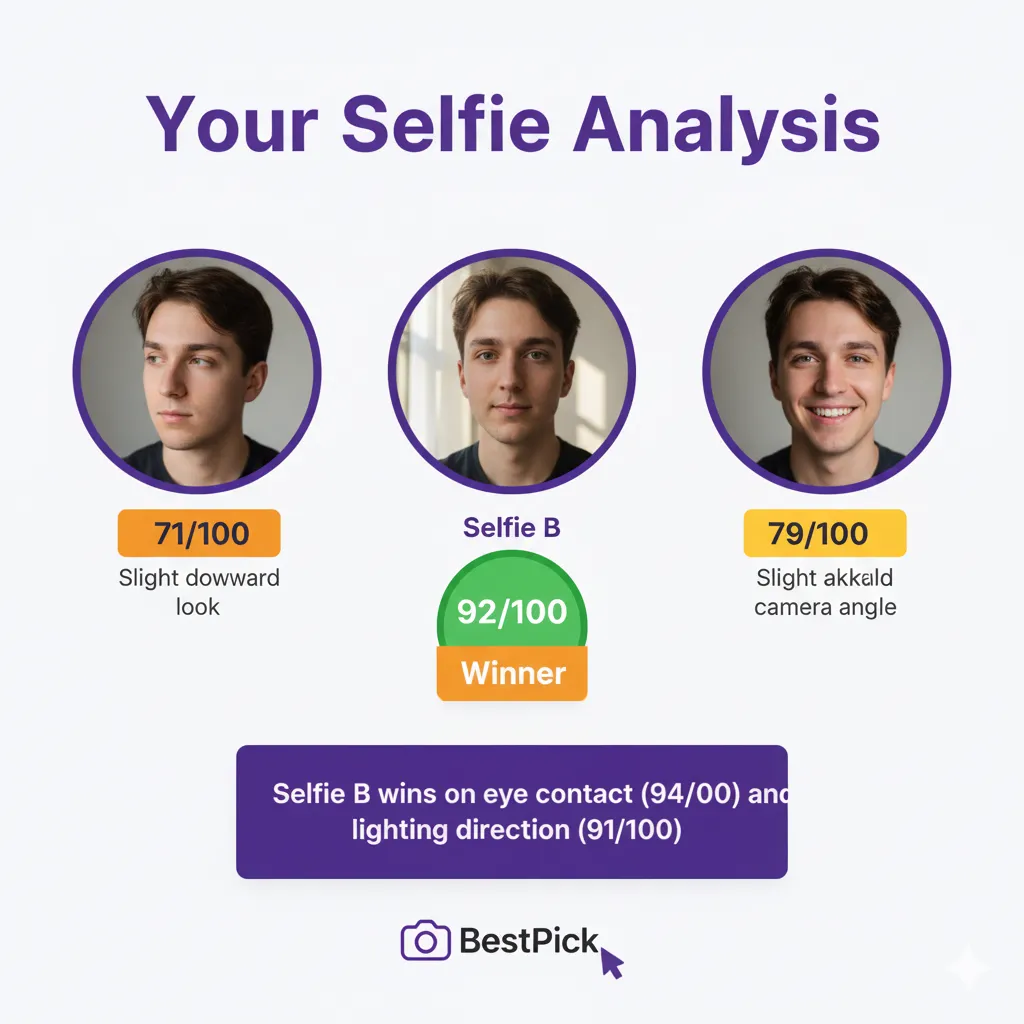
In BestPick's analysis, photos with direct eye contact score an average of 18% higher on engagement prediction than comparable photos with averted gaze. For a selfie, this is entirely controllable — and costs nothing to fix.
The Back Camera Advantage
Most people default to the front camera for selfies because they can see themselves on screen. But modern smartphones' front cameras are significantly inferior to their rear cameras in sensor size, optics, and dynamic range — which translates directly to lower-quality images with more noise, less sharpness, and worse low-light performance.
For profile photos that will be used professionally, consider using the rear camera with the self-timer (3 or 10 seconds) and a basic phone stand, stack of books, or the selfie stick's back-camera mode. Set up your shot, frame it by temporarily flipping to the front camera to check composition, flip back, and fire with the timer. The image quality difference is meaningful and often visible even at the compressed sizes platforms use.
The Selection Problem: Taking 20 Shots Is Only Half the Work
The most common mistake after fixing angle, light, and gaze direction is selecting the wrong shot from the resulting batch. After a 20-shot session, most people scroll through on their phone and pick whichever one they find least embarrassing — which is typically the photo where they look most like their self-image, not the photo that communicates best to strangers.
Upload your top 3–5 candidates to BestPick, select your platform goal, and receive an objective AI recommendation in under 10 seconds. The winning photo in BestPick's analysis is frequently not the one the user personally preferred — which is exactly the point. The photo that performs best for strangers is often not the photo that performs best for your own self-assessment.
Quick Setup Checklist
Before taking your next profile selfie, run through this checklist in under 2 minutes:
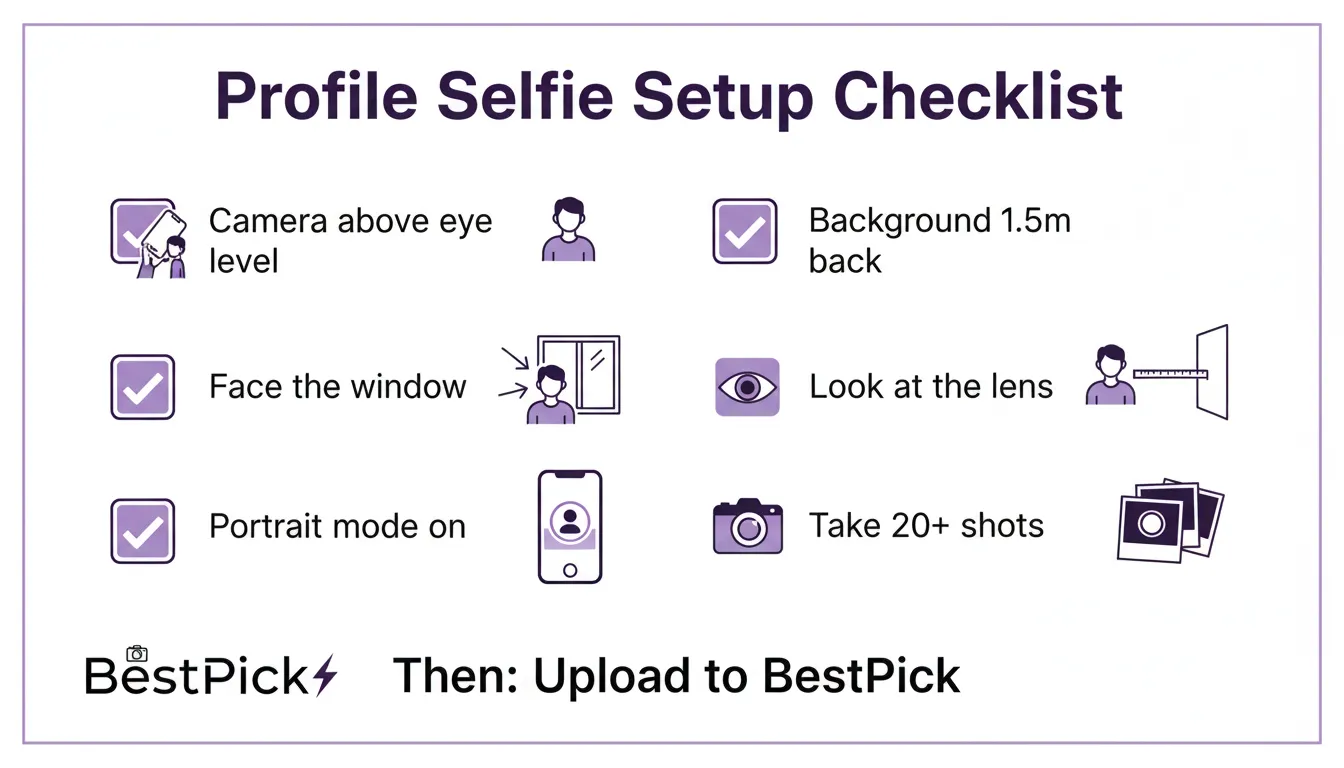
✓ Camera lens is 10–15cm above eye level, angled slightly downward toward you.
✓ You are facing a large window with indirect natural light.
✓ Portrait mode is enabled.
✓ Background is at least 1.5 metres behind you and is clean or neutral.
✓ You are looking at the lens, not your face on screen.
✓ You will take at least 20 shots before reviewing.
✓ You will upload top candidates to BestPick rather than choosing alone.
Frequently Asked Questions
Took Your Selfies? Now Let AI Pick the Best One.
Upload your top candidates to BestPick. Select your platform goal. Get an objective AI recommendation in 10 seconds — with written reasoning for which photo wins and why.
Analyze My Selfies Free →