A professional photographer session costs an average of £150–£300 in the UK and $200–$500 in the US. For most people updating a LinkedIn photo, a dating profile, or an Instagram bio, that cost is hard to justify — especially when a modern smartphone in the right conditions can produce results that are genuinely indistinguishable from a studio shoot.
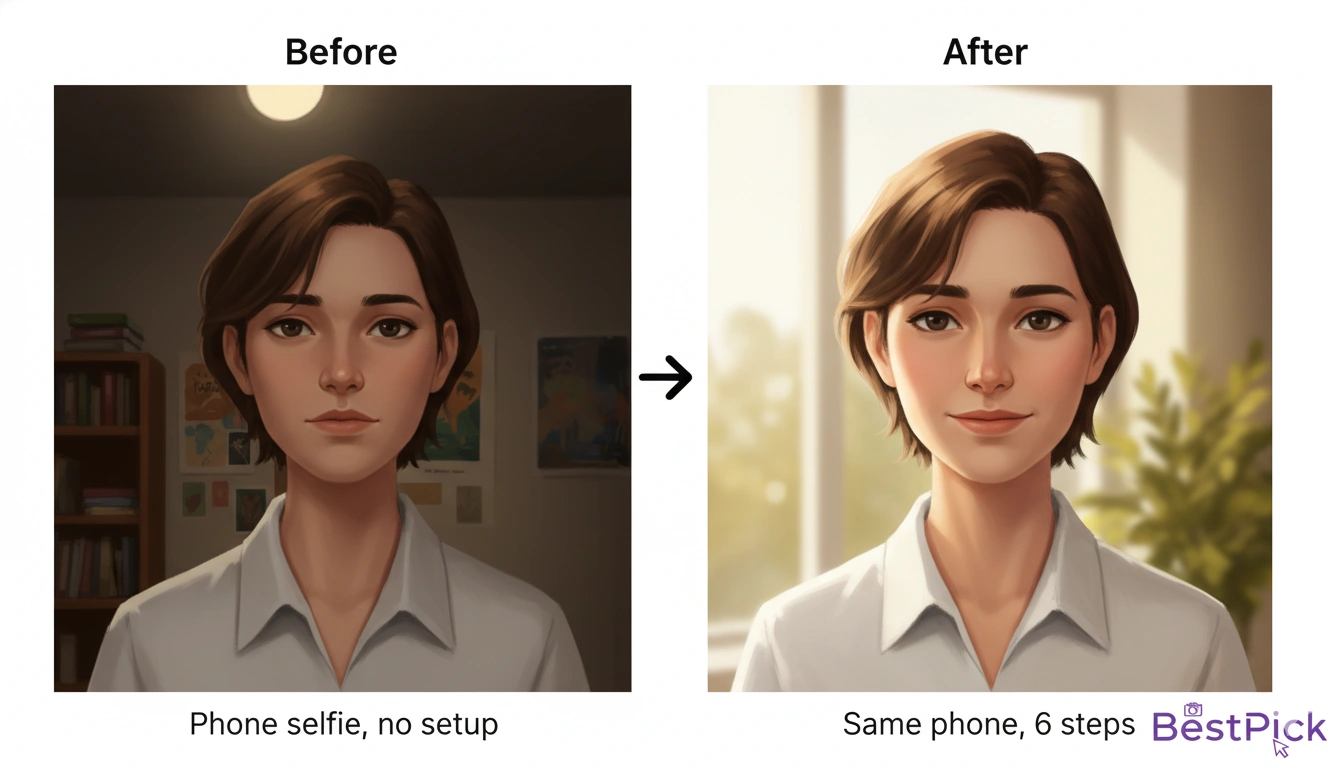
The gap between a bad phone photo and a professional-quality photo has almost nothing to do with the camera hardware. It has everything to do with three variables: light, angle, and selection. This guide covers all three in six actionable steps — and ends with the step most people skip, which is where most photo quality is actually lost.
A smartphone (any iPhone 12+ or Android equivalent), a window with indirect natural light, a clean wall, and 30 minutes. Total cost: £0.
Step 1: Choose Your Light Source First (Everything Else Follows)
Before you think about backgrounds, outfits, or poses — find your light. Light is the single variable that separates a mediocre photo from a professional one, and it costs nothing to get right.
Walk around your home at the time of day you plan to shoot and look for a room with a large window that receives indirect daylight — not direct sunlight streaming in, which creates harsh bright patches and deep shadows, but the soft, even light of an overcast sky or a window that faces away from the direct sun.
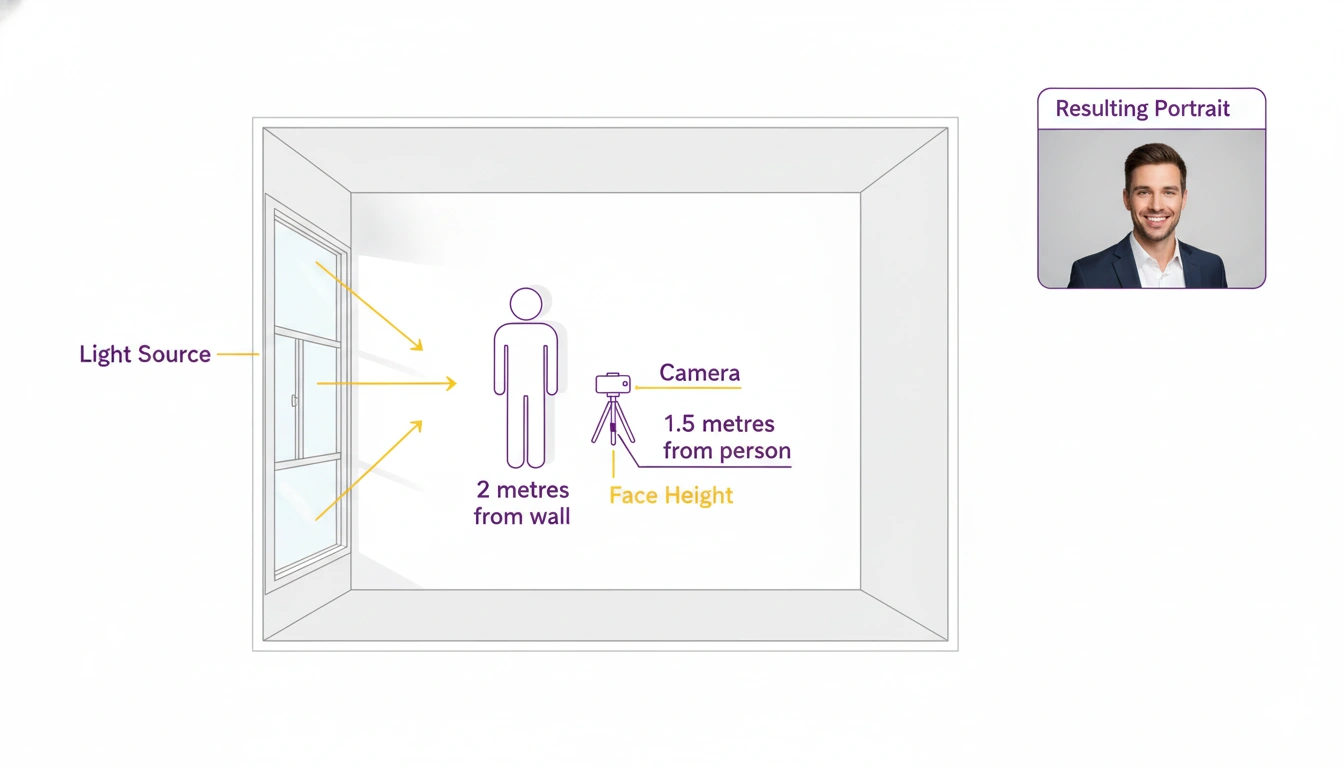
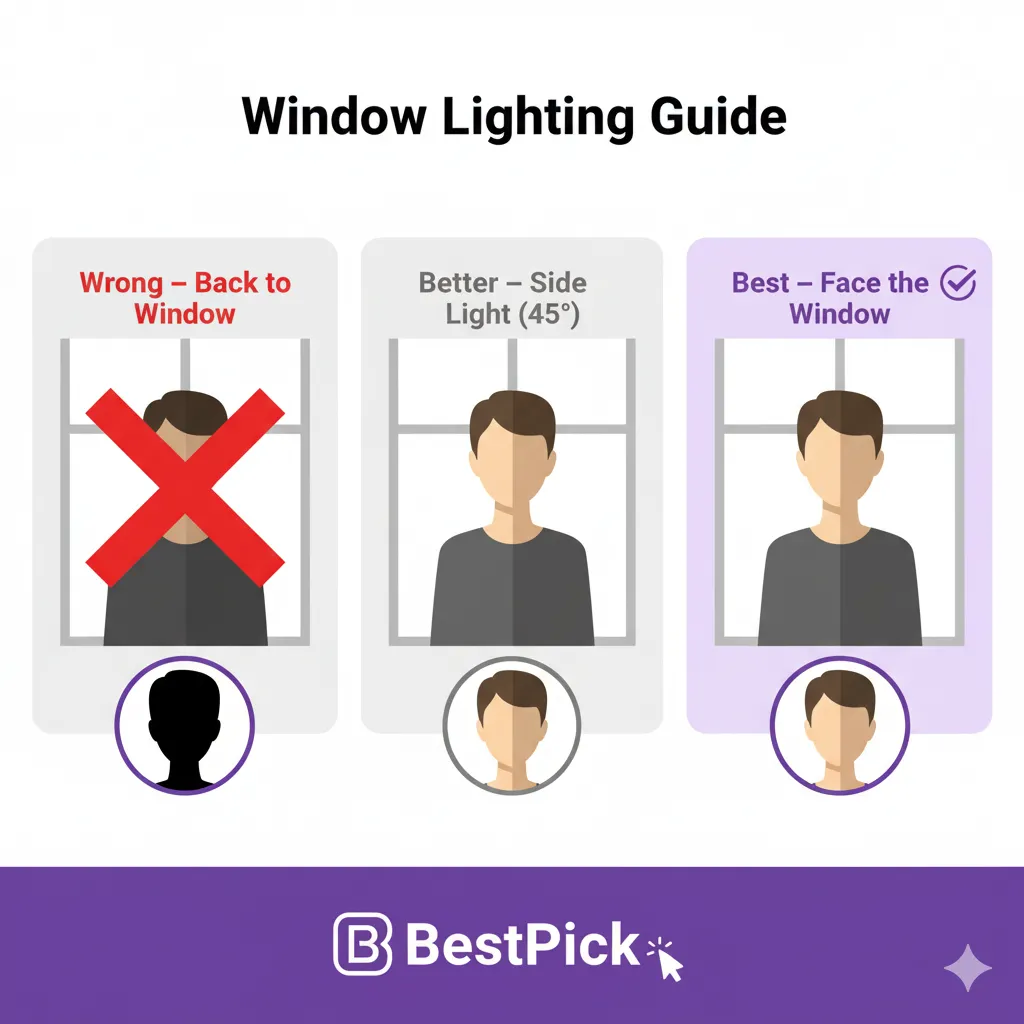
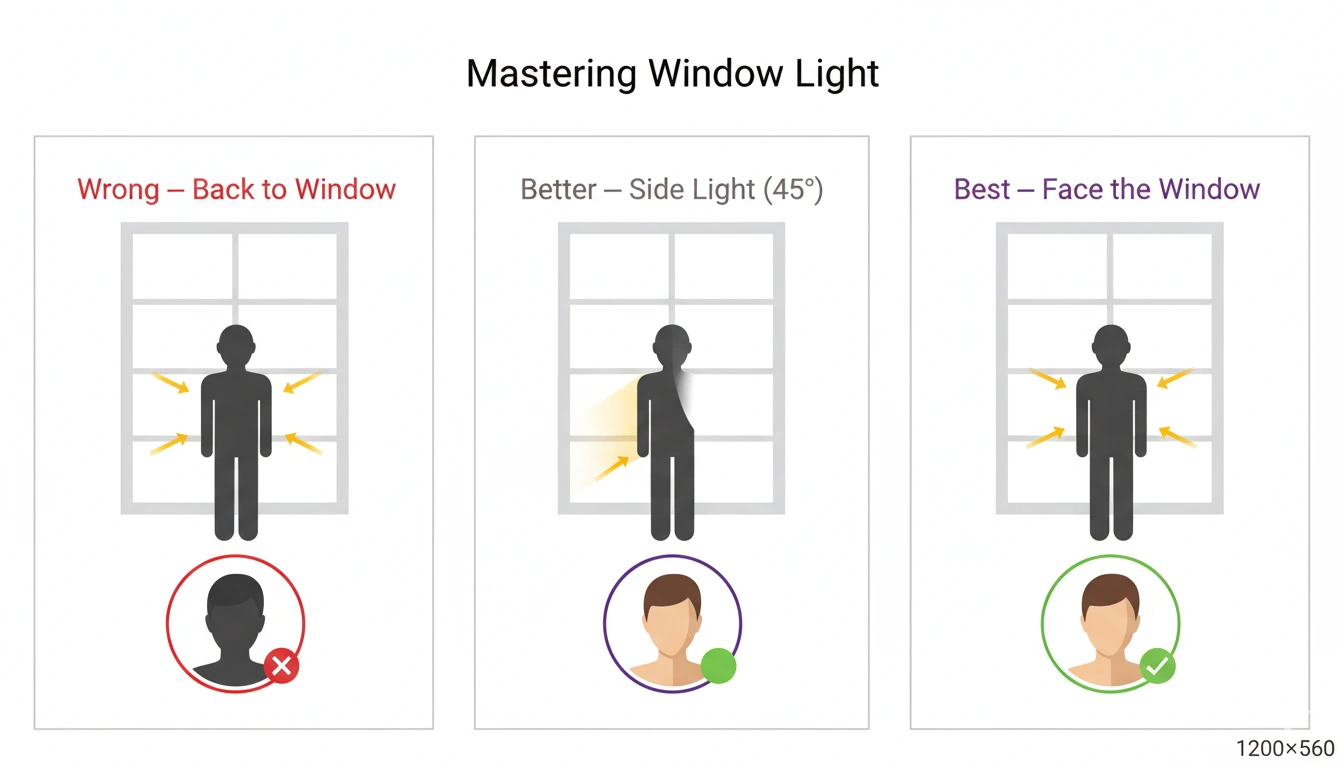
Once you have found that window, position yourself so you are facing it directly. The window becomes your key light. Your face will be evenly lit, your eyes will have natural catchlights (the small reflections that make eyes look alive in photos), and your skin will look dimensional rather than flat.
If the light is still too bright and creating some shadows, place a white sheet or white poster board just outside the window to diffuse it, or simply wait for a more overcast time of day.
Step 2: Set Up a Clean Background (And Why Distance Matters)
The background of your photo communicates context even when it is blurred. A clean, simple background signals professionalism and focus. A cluttered background — bookshelves, kitchen items, a visible TV — pulls attention away from your face and introduces distracting visual noise.
The most important background principle that most people do not know: stand as far from your wall as possible. When you stand close to a wall, the background appears sharp and detailed. When you stand 1.5–2 metres away from the wall, even without Portrait mode, the background becomes naturally softer. Portrait mode amplifies this effect dramatically.
The best background options for a home photo, in order of effectiveness: a plain painted wall (any neutral color — light grey, off-white, or muted green all work), a door with a clean surface, an outdoor fence or hedge, or a living room wall cleared of frames and objects. Avoid glass windows as backgrounds (reflections), mirrors (obvious reasons), and walls with visible art or busy wallpaper.
Step 3: Set Up Your Camera (Portrait Mode + Correct Height)
Camera angle is one of the most misunderstood elements of self-portraiture. The two rules that matter most:
Camera at eye level or slightly above — never below. A camera below eye level creates an unflattering upward angle that exaggerates the chin and compresses the face. A camera at eye level produces a natural, dignified perspective. Slightly above eye level (the classic "selfie angle") is flattering for most people because it creates a slight downward look toward the camera.
Enable Portrait mode. Portrait mode (or "Aperture mode" on some Android phones) uses AI-assisted depth mapping to create background blur (bokeh) that separates your face from the background. It also tends to optimize facial exposure automatically. Use it for every headshot session.
Set up your phone on a tripod, a stack of books, or ask someone to hold it. Enable the 3-second or 10-second timer. This removes the "selfie hand" from the shot and allows you to position your body naturally.
Step 4: Framing, Posture, and Expression
Framing: For a LinkedIn or professional headshot, frame from your chest upward. Your face should fill at least 50% of the frame — more for dating apps (60–70%), slightly less for Instagram lifestyle content.
Posture: Pull your shoulders back and slightly down. Tilt your chin very slightly down and forward — this elongates the neck, defines the jawline, and eliminates the double-chin effect that straight-on or upward angles produce. Think of it as bringing your face slightly toward the camera rather than pulling away from it.
Expression: Do not pose for the camera. Look just past the lens to a specific point on the wall behind the phone — this creates a natural, direct-gaze expression without the glazed-eye look of someone staring into a lens. Think of something that genuinely makes you happy just before the shutter fires.
Step 5: Take More Photos Than You Think You Need
Professional photographers take hundreds of shots per session and select three to five to deliver to the client. They do this because expression, light, and posture vary between every single frame — and the difference between an average shot and a great one is often a matter of milliseconds of facial expression.
In a 30-minute home session, aim for at least 20–30 shots. Vary your expression slightly between each burst: try a full open smile, a closed smile, a relaxed neutral expression, and a slight squint (which reads as warmth in many contexts). Take shots from slightly different angles — square on, then turned 15 degrees to the left and right.
Do not stop shooting because you think you look good or bad in the moment. What looks good on a 6-inch screen in your hand is not the same as what performs well as a cropped circular LinkedIn thumbnail. Take the shots first — evaluate them later.
Step 6: Use AI to Pick Your Best Photo (The Step Most People Skip)
This is where most people lose everything they just gained. After a 30-minute shoot with 25 photos, most people scroll through on their phone and pick whichever one they personally find least embarrassing. That is the wrong framework.
You are not the audience for this photo. Your recruiter, your potential match, your Instagram follower — they are. And research consistently shows that people are poor judges of their own most engaging photos. The photos you like of yourself (often the most flattering, the most "you") are frequently not the photos that communicate warmth, approachability, and professionalism most effectively to a stranger.
BestPick's free AI photo selector was built specifically to solve this. Upload your top 3–5 candidate photos from your session, tell BestPick your goal (LinkedIn, dating app, Instagram), and receive an objective, AI-powered recommendation for which photo will perform best — with a written explanation of the specific signals that drove the decision: lighting score, expression authenticity, background quality, composition framing.
The 10-Minute Edit (What to Fix and What to Leave Alone)
Once you have selected your best photo, a small amount of editing can elevate it further without crossing into over-processed territory. Use Apple Photos, Google Photos, or Snapseed (free):
Increase exposure slightly if the photo looks dark — +10 to +20 in most editing apps. Dark photos always look less professional.
Reduce highlights if there are blown-out bright patches on your forehead or cheeks from strong window light. Reduce by –20 to –40.
Increase clarity or structure slightly — +10 to +15 — to add crispness to facial features. Over-sharpened photos look artificial; subtle clarity adds definition without the processed look.
Do not use skin smoothing or beauty filters. These always look artificial, and they undermine the trust you are trying to build with your photo.
Took Your Photos? Now Pick the Winner.
Upload your session candidates to BestPick and get an instant AI recommendation for which photo will perform best — for LinkedIn, dating apps, or Instagram. Free, no account needed.
Find My Best Photo Free →